
We take our cars for granted until they don’t work. Then panic sets in.
Most of us ignore the dashboard light. Or that flickering turn signal. We tell ourselves we’ll fix it tomorrow. We drive with a burnt-out bulb because it’s dark enough to see. It’s a fatal flaw. Ignoring the problem is only step one. Step two is making it worse by trying to fix it wrong.
Here is the list. These are the common maintenance failures that happen whether you pop the hood yourself or hand the keys to a shop. Don’t get defensive. We aren’t judging your oil changes. But you need to know what’s broken.
10: Driving in the Dark with Burned-Out Lights
Your car has lights for a reason. You can’t just turn them off.
Burnt-out headlights, taillights, and brake lights aren’t just illegal in most states. They are dangerous. They make your car invisible. Other drivers can’t see you coming. You can’t see them braking.
It’s simple physics. Light reflects off your car. It signals your intent. No light? No signal.
Why this matters
Drivers assume other cars can see them. They can’t. Not if your brake lights are out. Not if your tail lights are dead. Night driving requires visibility. You are a dark object on a highway.
How to check
You don’t need a mechanic for this.
- Headlights: Aim them at a wall. Check for brightness and alignment.
- Taillights: Ask a friend to stand behind the car. Press the brake pedal. Watch for the red glow.
- Brake lights: Same test. Press hard. Ensure both sides light up.
- Turn signals: Watch them flash. Are they steady? Flickering? Dead?
If one side is out, you’ll likely only notice it when you look directly at the car. That’s the trap. You are not the car.
Which bulbs to buy
Don’t guess. Your owner’s manual lists the exact bulb size. H11. 9005. 3157K. 7443. It matters.
Buy the right one. Use gloves to handle the glass. Oils from your skin can cause the bulb to shatter under heat. Wipe it clean if you touch it.
Where to get help
If you can’t reach the bulb, take it to a shop. Auto parts stores often help with installation. It’s a quick job. Five minutes. Don’t drive another day with a dark car.
The road doesn’t care about your excuse. It only cares about visibility.
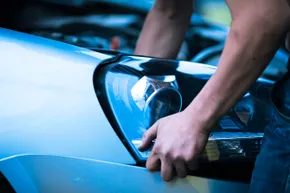
Why You Shouldn’t Skip the Light Check
Replacing bulbs is cheap. It’s fast. It’s arguably the most straightforward maintenance task you’ll ever do in your driveway. So do it.
You’ll know pretty quickly if your headlights or high beams are dead. You can’t see. It’s that simple. Your dash might flash a warning for turn signals too. But running lights? Taillights? Brake lights? Those are sneaky. You won’t notice them failing until someone is right behind you. And by then, it’s too late.
Check them. Every now and then. Look in a window reflection. Ask a friend. Pull over and walk around the car. It takes thirty seconds.
When one burns out, grab the owner’s manual. Follow the steps. It’s not dangerous. It’s not rocket science. Ignoring it is stupid. Getting pulled over for a dark tail light adds stress you don’t need. Getting rear-ended because another driver couldn’t see you is catastrophic. And both outcomes cost way more than a $15 bulb.
Don’t be cheap on safety. It’s not worth the risk.
The Jump Start Myth: Why Most People Get It Wrong
Most people treat jump-starting like a video game. You press X to jump-start. In reality, it’s a chemistry experiment with 12 volts of angry electricity. And if you mess it up, you fry your ECU. You blow a fuse. You might even start a fire.
Here’s the thing: you don’t need to be an electrician to do this right. But you do need to pay attention.
The Golden Rules of Jump-Starting
- Park close. Never touch. The cars shouldn’t touch. Not even a bump. Metal to metal creates a ground path that can damage sensors.
- Connect positive first. Red to red. Dead car’s positive terminal to the donor car’s positive terminal. Or the chassis if the terminal is buried.
- Connect negative second. Red clamp is on. Now the black clamp. But don’t just slap it on the dead battery’s negative post. Find a bare metal ground on the engine block or chassis of the dead car. Sparks near a battery can ignite hydrogen gas. Boom. You don’t want that.
- Start the donor car. Let it run for a few minutes. Give the dead battery some juice. Don’t rev it. Just idle.
- Try the dead car. If it doesn’t turn over, wait. Try again. If it still doesn’t work, your battery might be beyond saving. Or your starter is fried.
- Disconnect in reverse order. Negative first. Ground clamp off. Then positive. Don’t let the clamps touch each other.
“The most common mistake? Connecting the negative clamp to the negative terminal of the dead battery instead of a chassis ground.”
It’s not hard. It’s just specific. Misorder the steps, and you’re playing Russian roulette with your car’s electronics.
Why do so many people get it wrong? They rush. They don’t read the manual. They think all cars are the same. They’re not. Some modern cars have sensitive charging systems that hate reverse polarity. One wrong move, and you’re looking at a $2,00
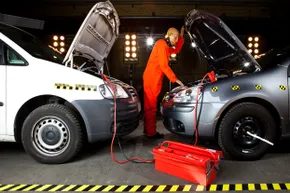
Owning jumper cables is not the same as knowing how to use them. You might have tossed them into the trunk thinking it covers the bases. Maybe you’ve done it once. That doesn’t mean you’re ready for the roadside emergency when your battery is completely dead. Skip this. Don’t wait until you’re stranded in traffic to figure out how to hook up a positive and negative terminal. One mistake can fry your car’s electronics or hurt you.
It seems simple enough. But the details matter. If you skip the safety steps, you’re gambling with expensive components.
Safety First, Then Connection
Get out of the road. Move to a safe spot. Turn off both vehicles. The ignition must be off in the donor car and the dead one. Check that.
Smoke is a no-go. Keep sparks away from the battery. Wear eye protection if you can. It’s cheap insurance.
Park the cars close. Not touching. Grilles aligned but separated. Ensure the cables won’t dangle into moving parts. Check the clamps. They should only touch the correct terminals. Nothing else.
The Right Order Matters
Start with the positive cable on the dead car. Then the positive on the donor. Connect the negative cable to the donor. The final clamp goes to an unpainted metal ground on the dead car’s engine block. Not the battery’s negative terminal. Spark risk.
Start the donor car. Let it run a few minutes. Try the dead car. Crank it. If it doesn’t start, wait. Don’t crank repeatedly. Give it time.
Remove cables in reverse order. Negative from the engine block. Negative from the donor. Positive from the donor. Positive from the dead car.
8: Haphazard Electric Work
Why Proper Technique Prevents Damage
Modern cars have sensitive electronics. A reverse connection can blow fuses. It can damage the alternator. It can destroy the ECU. The cost adds up fast. Proper technique avoids this. It’s not just about starting the car. It’s about protecting the vehicle.
Common Mistakes to Avoid
Connecting clamps to the wrong terminals. Touching metal to metal. Cranking too long. These are errors. They lead to problems. Learn the steps. Do them right.
What If It Doesn’t Start?
Wait. Let the battery charge. Check the connections. Try again. If it still fails, the battery might be beyond recovery. Call for help. Don’t keep trying.
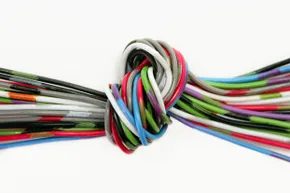
You don’t mess with house wiring without killing the main breaker. You check twice. Do the same with your ride. Laziness here doesn’t just annoy; it zaps.
Some pros claim 12-volt automotive current is too weak to kill you. Maybe. But “weak” doesn’t mean safe. Assume it can hurt you. Assume it can burn your garage down. Overload a circuit, and you’re looking at melted harnesses and expensive diagnostics.
The Battery Disconnection Protocol
Start with the car off. Obviously. Then go to the battery.
Disconnect the negative cable first. Isolate it so it can’t slap back against the terminal. Sparks happen. You want the circuit broken, not completed by a loose wrench.
Hybrids? Stay back.
High-voltage batteries in hybrids and EVs carry enough juice to stop a heart. The orange cables you see? Those are live. Don’t touch them. Don’t poke them. Respect the orange. It’s not a suggestion. It’s a survival rule.
7: The Myth of Bald Tire Longevity
Bald tires are a gamble. A bad one.
Tread depth isn’t just a legal requirement. It’s your only link to the pavement when water hits the road. Hydroplaning doesn’t care about your budget. It doesn’t care that you “feel” fine driving on worn rubber.
How Tread Depth Affects Stopping Power
New tires have deep grooves. These channels displace water. They bite into asphalt. As tread wears down, those channels get shallow. Water has nowhere to go. It sits between your rubber and the road.
You lose friction. Braking distances increase. Significantly. Wet roads double your stopping distance with worn tires. Ice? Forget it. You’re sliding until you hit something.
Which Tires Are Safe to Use?
The legal minimum in most states is 2/32 of an inch. That’s it. A penny in Lincoln’s head should be fully visible. If you can see the top of Abe’s head, replace the tire.
But why wait for the legal limit?
Performance drops long before you hit 2/32. At 4/32, wet traction is already compromised. At 6/32, you’re still safe on dry pavement, but rain changes everything. Don’t push it.
When to Check Your Tread
Do it monthly. Do it before long trips. A simple tread depth gauge costs a few bucks. Or use the coin test. It’s accurate enough for a quick check.
Wear indicators are built into the tires. Those little raised bars between the grooves. If they’re flush with the tread, you’re bald. The tire maker is telling you to change it. Listen to them.
The Cost of Ignoring Tread Depth
A blowout at 65 mph isn’t a minor inconvenience. It’s a loss of control event. You jerk the wheel. The car snaps. You end up in a ditch or a median.
Tires are the only contact patch. Eight inches of rubber. That’s it. Respect the contact. Replace the tires when they’re worn. Not when you’re desperate. Not when you’re broke. Now.
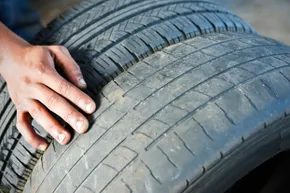
Stop trying to cheat the clock on your tires. You’re not saving money; you’re gambling with traction.
Think about the sheer volume of work your suspension and wheels handle daily. Potholes, curbs, wet roads. Now picture trying to walk through a blizzard in flip-flops. Or taking a sprint in stilettos. It’s absurd. Your feet need support. Your car needs grip. Rubber degrades. Period.
If you bought a used ride or just don’t keep receipts, you have no idea how old the rubber is. It doesn’t matter if the tread depth looks fine. Rubber rots from the inside out. Micro-cracks appear where you can’t see them. Structural integrity drops. The tire loses its shape under load. If the tread breaks away from the casing, you’re looking at a catastrophic failure. That’s how trucks blow out. You don’t want that in your sedan.
6: Sloppy Lube Job During Brake Repair
Brake squeal is the most common complaint after a service. Usually, it’s not a defect. It’s laziness.
When mechanics replace pads or rotors, they must lubricate the contact points. This isn’t just about reducing noise during the job. It prevents the hardware from seizing to the bracket. It allows the pads to slide back and forth freely when you brake. Skip the grease, or use the wrong kind, and you get vibration. Vibration causes squeal.
The Lube Points That Matter
Not every surface needs grease. In fact, grease on the friction surface is a disaster waiting to happen. You need high-temperature copper or silicone-based grease on specific metal-to-metal interfaces.
- Pad Abutment Clips: The metal clips that hold the pads in place. Grease here reduces friction between the clip and the pad backing plate.
- Shim Surfaces: If your pads have dampening shims, grease the back of them. Not the face.
- Caliper Slide Pins: These need specific high-temp white lithium or synthetic grease. Dry pins cause calipers to stick. Sticking calipers cause uneven wear and heat buildup.
Using the wrong lubricant is worse than using none. Standard WD-40 or brake cleaner leaves residue that attracts dust. Dust mixes with the grease to form an abrasive paste. This paste accelerates wear on the caliper pins. It also causes corrosion over time. Corroded pins mean the caliper doesn’t return fully. The pad drags against the rotor. Dragging pads overheat. Overheated pads fade. Faded brakes don’t stop you.
Which Grease Should You Use?
Not all lubricants are created equal. You need a product rated for at least 1200°F (650°C). Standard automotive chassis grease melts at brake operating temperatures.
- Copper-based anti-seize: Good for threads and high heat. Avoid getting it on the rotor face.
- Silicone-based brake grease: Safe for rubber seals and plastic components. Doesn’t degrade caliper boots.
- Ceramic brake grease: Often comes pre-applied on premium pads. Designed specifically to reduce high-frequency vibration.
Check the manufacturer’s service manual. Some European models require specific lubricants for their unique
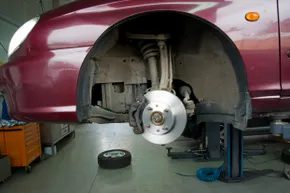
Brakes are deceptively simple on paper. Press the pedal, hydraulic pressure builds, calipers clamp pads against rotors, and friction stops the wheel. But simplicity doesn’t mean safety. And it certainly doesn’t mean you can slap it back together with a wrench and a prayer.
The real danger zone isn’t the physics. It’s the assembly.
When you’re tearing down brake components, you’re dealing with moving parts. Metal on metal. Without lubrication, those parts seize. But you can’t just use any grease. You need brake-system-specific lubricant. And you have to be surgical about it.
Think of it like tattooing an expensive steak. One slip, one drop in the wrong place, and you’re done. If axle grease or caliper lube touches the friction surface of the brake pads or rotors? Your brakes fail. Completely. Zero stopping power.
It’s not a malfunction. It’s a disaster waiting to happen.
The Lug Nut Trap
Forget about the grease for a second. Let’s talk about the most common amateur mistake.
Forgetting to torque the lug nuts.
You’ve got your wheel back on. It looks tight. It feels tight. But “tight” isn’t a spec. And “hand-tight” is a liability.
Lug nuts need torque. Specific torque. Usually between 80 and 100 foot-pounds for most passenger cars, but check your manual. Always check your manual. Guessing? That’s how wheels fall off.
Why does this matter? Because vibration.
Drive the car. The suspension moves. The wheel rotates. If the nuts aren’t torqued to spec, they loosen. Then they vibrate. Then they rattle. Then they come off.
And you don’t want to find out your lug nuts are loose while doing 60 on the highway.
So here’s the rule:
- Torque in a star pattern. Not in a circle. Star. This ensures even pressure on the rotor.
- Use a torque wrench. Not a ratchet. Not an impact gun. A torque wrench.
- Retorque after 50 to 100 miles. Parts settle. Metal compresses. The spec changes slightly. Go back. Double-check.
This isn’t just about keeping the wheel on. It’s about keeping the rotor centered. If the wheel wobbles because the nuts are loose, you’re warping the rotors. Then you’re not just fixing brakes. You’re replacing rotors. And that’s expensive.
The Hydraulic Bleed
You changed the pads. Maybe the rotors. But did you bleed the brakes?
If you opened the caliper bracket or replaced the brake lines, air got in the system. Air is compressible. Fluid is not. When you press the pedal, you’re squeezing air. The pedal goes to the floor. The car doesn’t stop.
Bleeding isn’t optional. It’s mandatory if you’ve disturbed the hydraulic circuit.
You need a helper. Or a one-man bleeder kit. But you need both ends of the process:
- Open the bleeder screw.
- Have your partner press the pedal (or you use the pump).
- Close the screw before the pedal hits the floor.
- Repeat until no air bubbles come out
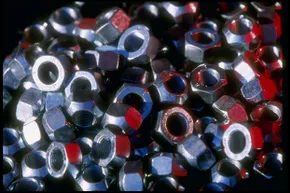
Popular Mechanics has a guide on nailing the torque specs. Ignore the intimidation factor. If you’ve lifted a car off its jack stand and swapped a wheel, you’re capable of this. Check the manual. Use a torque wrench. That tool exists for a reason.
Yet, people still mess it up. They rotate tires. They bolt them back on. They drive away. The lugs aren’t tight enough. The wheel doesn’t stay put.
It’s not just under-tightening. Over-tightening happens too. Less obvious. Just as dangerous.
Loose wheels wobble. They work their way off. Over-tightened studs snap. The metal-to-metal friction tears something apart. The lug nut or the stud fails. Usually the smallest part. You don’t want that happening at highway speeds.
4: Forgetting to Replace Drained Fluids
When you drain oil, you’re not just emptying the pan. You’re leaving the system dry. Refill it. Check the level. Don’t skip this step. It’s basic maintenance. If you don’t, the engine grinds. It seizes. It dies. Simple as that.
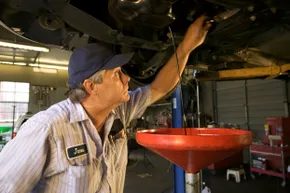
Gasoline gets all the credit. Without it, you go nowhere. That’s bad. But it’s not the worst-case scenario if you pull over safely. The real danger lies in the other liquids humming through your system.
Engine oil? Non-negotiable. Dry moving parts? Seized engine. Game over.
Transmission fluid keeps those gears sliding. Brake fluid maintains hydraulic pressure for stopping. Coolant (or antifreeze) regulates temperature so you don’t boil over or freeze solid. Lose any of these, and you’re looking at a catastrophic failure.
We’ve all heard the horror stories. The discount shop technician who installs a fresh oil change but forgets to refill the sump. It happens to the pros. It can happen to you.
If you’re wrenching in your own garage, double-check. Triple-check. Verify every drain plug and refill. Don’t trust the mechanic blindly either. A quick post-service check saves thousands.
And forget about running low on windshield washer fluid. That’s annoying. Failing to maintain critical lubricants? That’s expensive.
The $500 Mistake: Forgetting to Tighten the Oil Filter
You change the oil. You refill the filter. You spin it on by hand. You think you’re done. You’re wrong.
If you don’t properly tighten that oil filter, you’ve got a problem. A big one.
The oil filter isn’t just a passive component. It’s a high-pressure vessel. Engine oil operates under significant pressure, especially during startup when the pump is working hardest to circulate fresh oil throughout the block. If that filter isn’t torqued to specification, the seal won’t hold.
You’ll see it immediately. A steady drip. Then a stream. Then a fire hazard if that hot oil hits your exhaust manifold.
But here’s the thing most DIYers miss. They tighten it until it feels “snug.” That’s not enough. You need torque.
Most modern oil filters require a specific torque value, usually listed in the owner’s manual or on the filter box. If you don’t have a torque wrench, you can still get close. Spin it on by hand until the gasket contacts the engine block. Then use a filter wrench to tighten it an additional three-quarters to one full turn. Check your manual for the exact spec. Some performance filters need more. Some cheap spin-ons need less. Guessing is how you end up with an oil-soaked garage floor and a dry engine block in ten minutes.
And don’t skip the gasket. If the old rubber ring sticks to the engine block, the new filter’s seal is compromised. You’ll get an instant leak. Peel that old gasket off. Wipe the surface. Install the new one. Tighten correctly.
It takes thirty seconds longer. It saves you a tow truck bill.
1: The Oil Filter Trap
Low oil pressure doesn’t give you a heads up. It just kills the engine. Before you’re stuck waving down a stranger on the shoulder, check your levels. A dry pump is a dead engine.
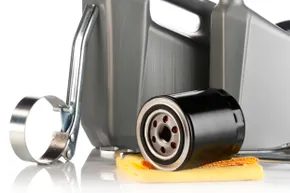
Mike Allen at Popular Mechanics drops a specific detail most DIYers miss. You need the right wrench. Not just any strap or socket. If the tool wraps loosely around the canister, you’ll spin your arms and get nowhere. It feels like work. It isn’t.
Change brands? The old tool might not fit. Stand at the parts counter. Test the fit. Don’t drive off with the wrong size. It saves a trip back.
Hand-tighten the filter first. Then grab the wrench. Crank it down that final half-turn. This isn’t optional. A loose filter leaks oil onto hot exhaust manifolds. You might think the engine will seize first. It won’t. The fire under the hood will end your drive long before metal grinds on metal. Smoke is faster than seizure.
2: Ignoring Warning Lights
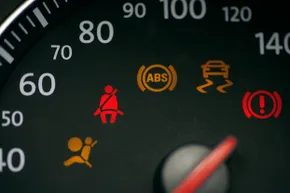
You know that feeling. The check engine light flickers on during a commute. You stare at it. You ignore it. You tell yourself you’ll deal with it next week. Then next month. Then you forget.
This is the “little boy who cried wolf” scenario of automotive ownership. It’s easy to get numb to the dashboard. You convince yourself there’s nothing wrong. Or worse, you think you know exactly what’s wrong—a loose gas cap, maybe—and you decide to fix it eventually.
There is nothing wrong with learning your car’s quirks. It’s good to know the difference between a warning and a nuisance. But when a light appears, you need to listen. Even if you don’t want to. That’s the job of these icons. It’s a conundrum. You want convenience, but the car demands attention.
The Cost of Desensitization
At a minimum, you must know what every indicator means. If a symbol is unfamiliar, check the owner’s manual immediately. Don’t guess.
Some issues are trivial. Low tire pressure is the classic example. Buy an inflator. Fix it. Done. It feels good. You solved the problem. But if the light signals a complex failure, call a pro.
Becoming immune to your car’s cries for help saves money in the short term. It costs a fortune in the long run.
1: Flouting Safety Recalls
This is where the “ignore it” attitude becomes dangerous. And expensive.
Manufacturers issue recalls for a reason. They find defects that could cause fires, brake failures, or steering issues. If you receive a recall notice, you have to act.
Ignoring a safety recall isn’t just negligence. It’s a liability.
Why recalls matter:
– Safety: The defect is often critical.
– Cost: Repairs are free.
– Legality: Some regions mandate compliance.
You cannot “wait and see” with safety systems. The part will not fix itself. The risk will not go away.
If you own a vehicle with an open recall, schedule the repair today. Not tomorrow. Today. The dealership will handle the cost. Your insurance won’t cover it if you choose to ignore it and an accident occurs.
Think about it. Would you drive a car with a known brake flaw because you’re busy? Probably not. But the check engine light? It’s subtle. It’s easy to dismiss. Don’t be that driver.
Why Recalls Happen and What It Means for You
Not every safety alert follows the same path. Sometimes the manufacturer spots a flaw first. Other times the National Highway Traffic Safety Administration (NHTSA) forces their hand. The agency tracks consumer complaints like a hawk. The stakes vary wildly. One alert might warn of tires that explode. Another warns of gas pedals that stick or accelerate on their own. Those are life-threatening. Then there are the cosmetic ones. Peeling clear coat on alloy wheels looks bad. It won’t kill you.
Major recalls dominate the news cycle. Manufacturers and dealerships usually send letters. They want you to fix it. You can also check online. Call your dealer. This is especially important for used car buyers. They can run your VIN. It reveals outstanding recalls for that specific make and model year.
If you pay for a repair on a safety issue that isn’t part of an official recall, keep the receipts. Save every piece of paper. If a related recall happens later, you might get reimbursed. Money back is money back. Occasionally, someone else covers the cost. Don’t ignore that opportunity.
How to Spot and Handle a Recall
The process is bureaucratic but straightforward. Dealerships have the data. Use it.
Checking for Outstanding Recalls
You don’t have to wait for a letter. Check online. Use your VIN. Call your local dealer. They can run the numbers. It tells you exactly what’s broken. And what’s free to fix.
The Paper Trail Matters
If you pay for a repair that isn’t covered by a recall, save the invoice. Future related recalls might cover it retroactively. You never know. Better safe than sorry.
When Others Pay
Sometimes a manufacturer or third party covers the cost. Don’t waste it. Fix it.